How to set up your nano tank
In the article I’m going to tell you about How to set up your nano tank. I knew when I reviewed the Superfish Aquacube aquarium back in the September issue that it would make a nice planted aquarium, and I couldn’t wait to get it set up. This new cube-shaped tank has an appealing design, with silver trim, overhead lighting and curved edges on the front corners (which are reminiscent of the small tanks used in the world-famous Nature Aquarium World series of books by Takashi Amano).
Its small volume of just 25 l,/5.5 gal., and external dimensions of just 30cm/12″, make it a great desktop aquarium or extra tank to complement a kitchen, bedroom or office. With a tank that looks this good there is no excuse not to be able to find space for it either.
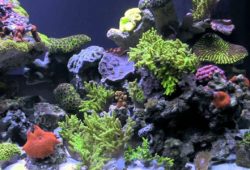
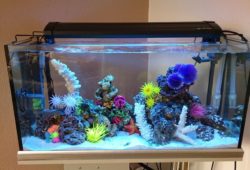
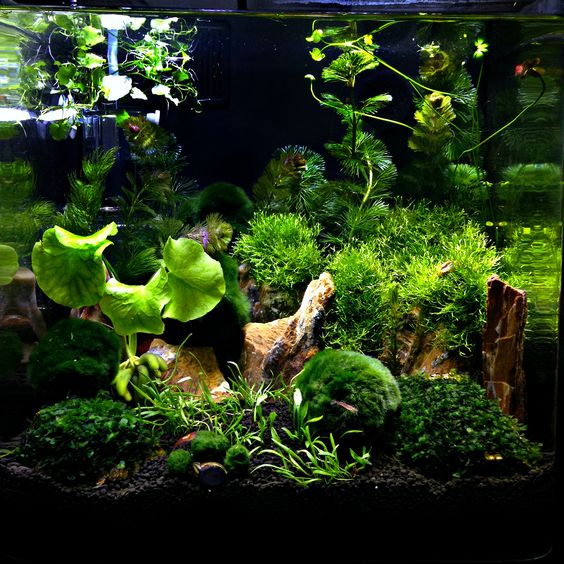
Heavily planted and illuminated, this tank looks like a prism of life, vibrant and glowing green, but if planted tanks aren’t your thing there are loads of other ways of filling the tank. You could opt for an invert only nano reef or a tiny world dedicated to Tanganyikan shell dwellng cichlids like Neolamprologus multifasciatus, or staying on the cichlid theme, how about some Apistogramma, with wood, stained water and leave.
To complement the planting scheme I added some Ember tetras, Hyphessobrycon amandae, that I got on a trip to Maidenhead Aquatics @ Peterborough. To clean up I also added some Otocinclus, also from Maidenhead, as like the Embers they are true dwarfs growing to a maximum of a few 2cm in length.
In this instance I chose to keep the fish selection simple, adding just 13 fish in total, and from only two species. The hardest part was deciding, as there was a large selection of mini fish species to choose from. And if you run out of fish stocking room there is always room for shrimps like the ever-helpful Algae eating shrimp, Caridina japonica.
But remember not to go too mad with your livestock – this is only a small tank, after all, so try not to overstock it.
The best thing about this small aquarium was the low cost of setting it up, and the whole tank was planted for the same price as a nice coral. Small fish are cheap too, and water changes an absolute doddle. Appreciate this – one 10 l. bucket constitutes almost a 50% water change. The price of powering it is very low too.
Small tanks have all the appeal of larger ones, with obvious financial and labour savings against larger models. Just when you said to yourself “no more tanks” this one might persuade you to set up just one more! Here’s a step-by-step guide to setting up an aquarium like this one…
Contents
Step-by-step video
Watch us in our photographic studio setting up this nano tank, then follow the step-by-step guide below for full details on creating this wonderful planted display.
Step-by-step guide
Step 1
This tank will be set up as a planted aquarium, and to get it right first time we are starting at the bottom. This Sera Floradepot substrate goes underneath any gravel substrates, and provides plants with all the nutrients that they will will need. Sprinkle enough to cover the base. A heating cable has not been added due to the small size of this tank.
Step 2
The Floradepot should be covered with a layer of gravel. I opted for this specialist plant substrate from Unipac. It is inert and its uniform colour will highlight the green of the planting scheme. Wash it well beforehand, and cover to a layer of 5cm/2″ or more.
Step 3
The Aquacube comes with a suitable filter for planted aquaria, but for tropicals you will need to add a heater. Because of the size of the tank, opt for a heater that is physically quite small and able to fit on the inside edges of the tank. In this case I have placed it on the back with the aim of hiding it with plants. Take the venturi off the filter and stick the filter to the back glass. Place it so that the outlet is at least 5cm/2″ under the water surface. This will prevent CO2 from being vented off through agitation.
Step 4
I tried a number of small CO2 systems out on this tank and settled for the simple Sera set. It works by filling a vessel with CO2 from a tablet, which then diffuses slowly into the water. It is probably the simplest form of CO2 addition available, and is inexpensive too. Stick it on the back or one of the sides.
Step 5
Half fill the tank with water ready for planting. The key is not to disturb the plant fertiliser under the gravel, or to disturb any dust that may still be in the gravel. Use a colander or dish to spread the water out as it falls, and pour slowly into the tank.
Step 6
If you use tapwater, you must dechlorinate. Plants can be shocked by changes in temperature and pH so ensure that the water is not too cold and test it before filling. If you use RO water, pure RO is too minerally deficient for sustained plant growth, so you must add minerals and electrolytes in liquid or powdered form.
Step 7
The first decorative element to go in is this plant on wood. This particular piece has Anubias, Java moss and Java fern on it and provides an instant aquascape. No other wood or rocks have been used.
Step 8
Next place the tall plants at the back of the tank. Cyperus helferi has been divided and planted in such a way as to disguise the filter behind it. It is not an easy plant to grow and demands bright light and CO2, but when it does grow it is very elegant. For an easier, tall, background plant choose Cryptocoryne balansae or Vallisneria.
Step 9
For the mid ground I have chosen Echinodorus tennellus, the Pygmy chain sword, and on the opposite side, Rotala wallichii. To provide alternation of leaf shape, I have placed the fine leaved Rotala in front of the straight Cyperus, and the Echinodorus in front of the Indian fern. The Echinodorus should be straightforward and will reproduce by runner. Although known as difficult plants, I tested Rotala wallichii long term at home and found it simple to grow.
Step 10
For the foreground I thought I would try some Lileaopsis. When it grows it looks magnificent as it forms a tight green lawn, but it does need bright light and CO2. It is shorter than the E. tennellus, another carpeting plant, so can be planted right at the front. Finally, for something different I have added some moss balls, Chladophora. They need no special care and just provide an unusual decorative element. I have placed four small moss balls in a mini pyramid.
Step 11
Once planting is complete, gently top up the tank with the same water as before. Add liquid plant food to complete fertilisation, and continue to add it at the same time weekly from then on.
Step 12
Place the glass coverglass on, (clean it first,) and attach the clip-on light. Plug the light into a timer and set it to come on for 10 hours per day. For demanding plants like Glossostigma and submerged Riccia fluitans, increase the lighting and the CO2 by adding a yeast-based or pressurised system.